
")


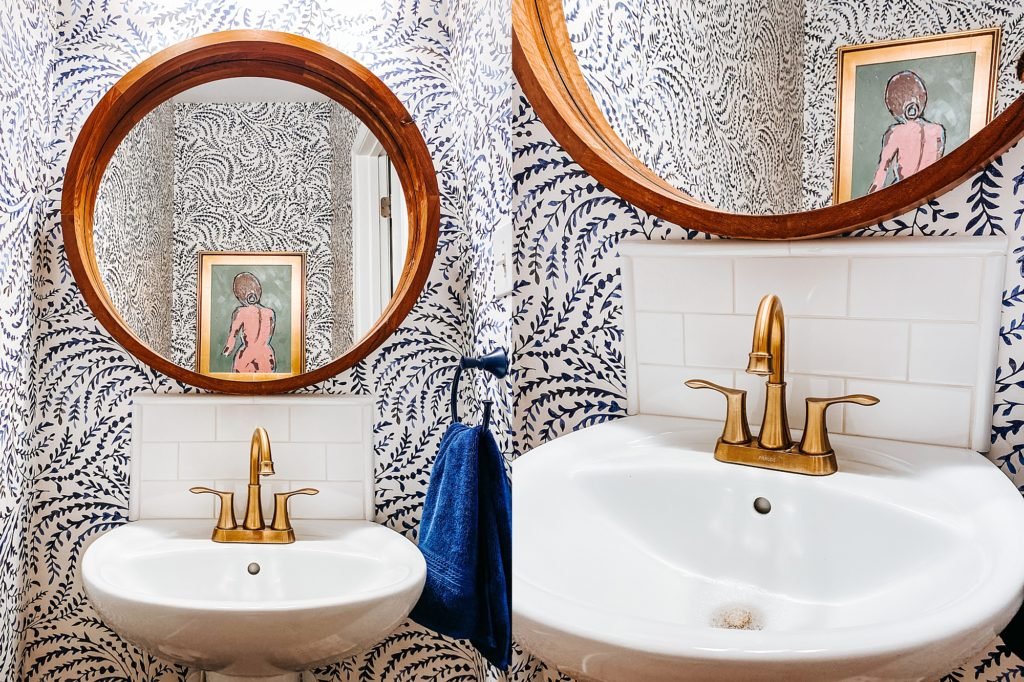
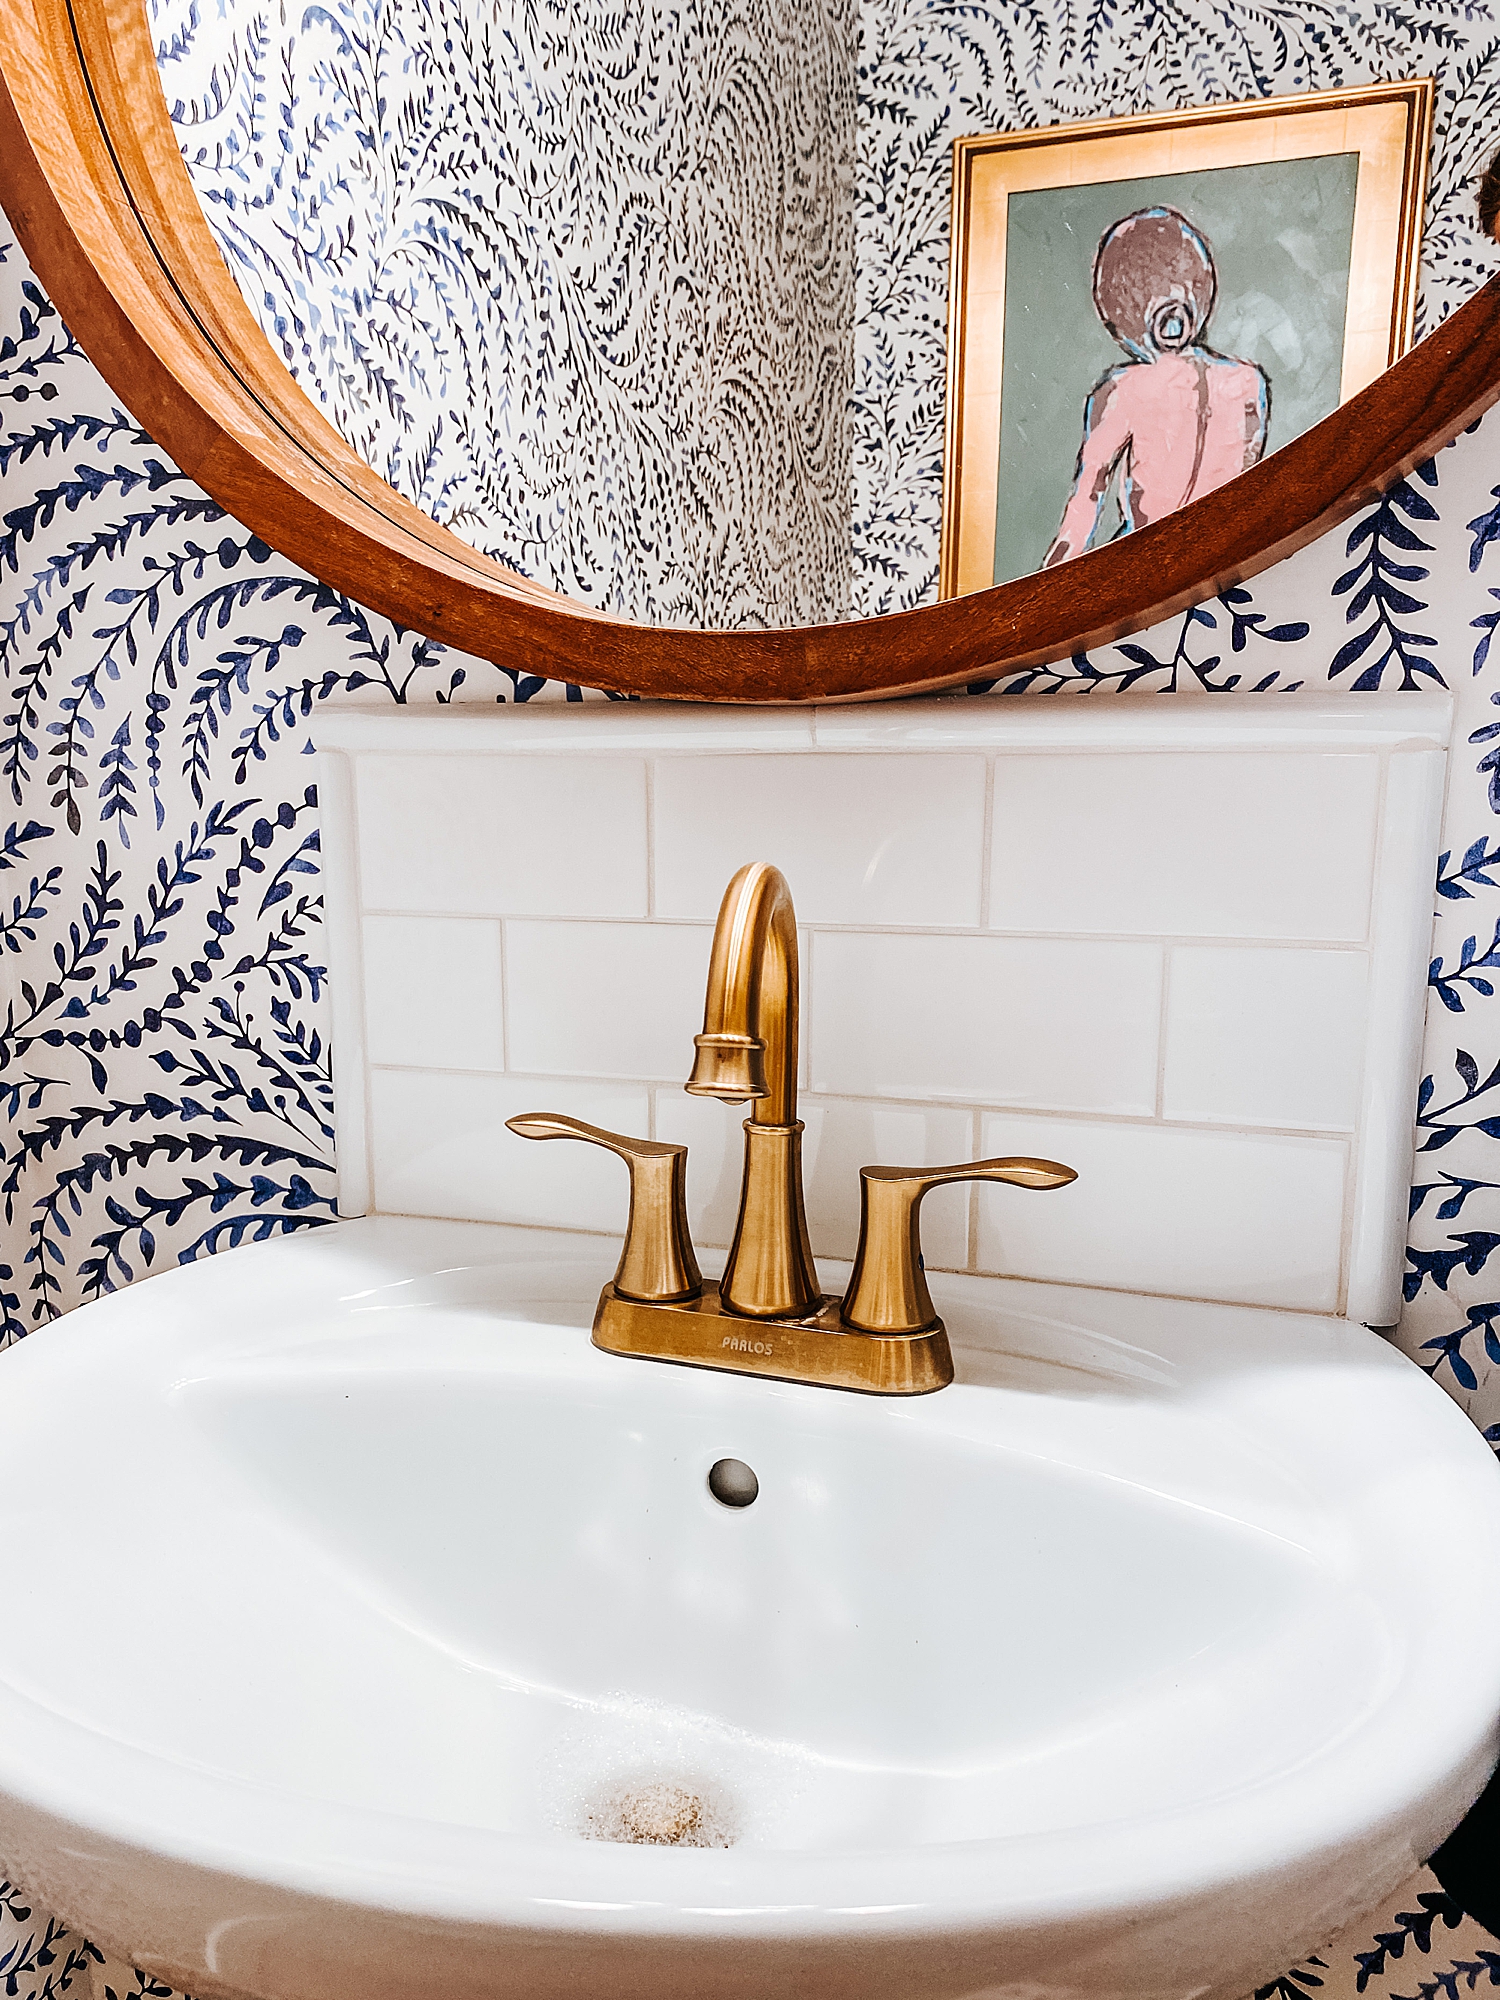
Our downstairs powder room has my favorite wallpaper in it. And while I LOVE the wallpaper and the statement it makes in that room, this half bath gets a lot of use. The sink in the powder room is where the kids wash their hands after every meal and with all of that use (and mess), the wallpaper behind the sink was beginning to discolor slightly.
We decided to add a small backsplash behind the sink to help protect the paper from peeling or discoloring any further. Although we were super nervous to damage the wallpaper, it was a surprisingly easy project and a great first opportunity to try our hand at tiling.
Here is a list of materials that we used:
- tile of choice (we used 6 inch ceramic subway tile)
- 11 inch ceramic quarter round
- tile snap cutter
- tile trowel
- large sponge
- wet rag
- Type 1 tile adhesive
- grout (we used white)
- putty knife
- blue painter’s tape
- bucket
- 1/16 inch spacers
- grout float
- bucket of water
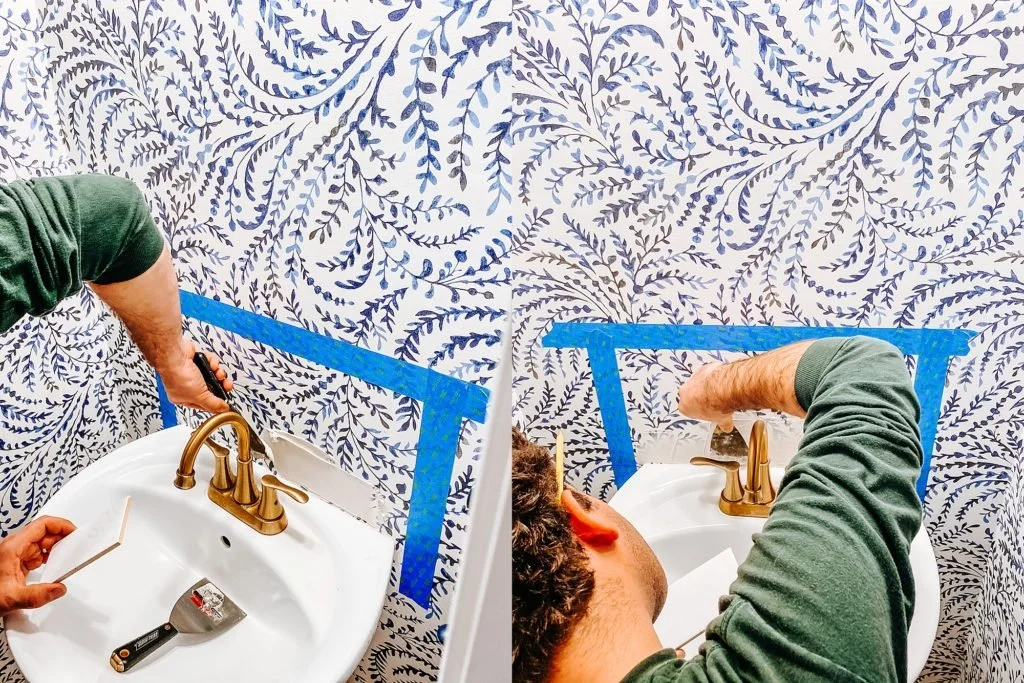
Start by measuring and taping-off the area you want to tile. We went for painter’s tape instead of a pencil or marker because we were working on the wallpaper.
Decide on how you want to layout your tiles. We laid them on the floor to select the spacing and picked which tiles to cut. The top and bottom rows included three full tiles and we cut one piece in half for on each end of the middle row. This was the easiest option because we only had to cut one tile and the edges. Consider the size spacer you are using when making the measurements and include those in your final layout.
Mark the tile (on the top) where you plan to cut them. You can use a Sharpie and wipe off after you cut (if using ceramic tiles). We found marking the tile on the back was too challenging to line up properly in the snap cutter.
Next, cut the quarter round pieces for the edges based on how high you want the tile up the wall. Unless you are using a wet tile saw, cutting the quarter rounds at 45 degrees isn’t possible so we just lined them up at 90 degrees instead. We also cut the top two pieces to the same length so that the joint fell right in the middle and directly behind the faucet.
Once the tile is all cut and you are happy with your layout, you can begin to ad the adhesive. We recommend cutting all the tiles and edges before starting this step because you need to move fairly quickly.
Using the tile trowel and putty knife, spread the tile adhesive at about 1/8 of an inch thick. Start with just a little bit at a time – you don’t want to use too much because it will squeeze through the grout lines. It is easier to add more if you need than to try and scrape any off.
Once the adhesive is on the wall, start at the bottom and begin applying the tile and spacers. We applied all of the subway tiles first and saved the quarter round for the edges last. Wipe any excess adhesive off of the tiles with a rag and leave it to set overnight. Do not let anyone splash water on the backsplash during this time. (We locked the bathroom from the inside so the kids couldn’t come in and mess with it ?)

The following day, use the putty knife to remove any wax from the tiles. Many ceramic tiles have a small amount of wax on them to keep them from rubbing on each other when in transport. It is white or clear and should come off fairly easily.
Remove the spacers from between the tiles. Next, we start on the grout!

We used pre-weighed grout where you just add water since we were working with such a small area. Add water according to the directions and stir with a paint stirrer. Once mixed, begin applying grout with the grout float (pictured on the above image on the right). Add a large glob of grout near the bottom of your backsplash or onto your float. Begin in the middle of the bottom of the tiles and work your way out and up, in a diagonal fashion. The tiles will be covered in the grout as well, not just the grout lines – that is okay!
Once all of the joints are filled, dip your sponge in the bucket of water and ring it out so that water doesn’t drip from the sponge. Wipe the front of each tile and grout lines to remove excess grout. Repeat this step until all grout lines are smooth and the tiles are clean.

Allow the grout to set for approximately four to six hours (check the specific instructions on the grout you purchase). After the grout is set, you can use a damp wash cloth with dish soap to clean any remaining grout from the tiles.
Many grouts recommend using a sealer as a final step. We haven’t done this (yet) but likely will in the coming weeks. I will report back when we find one we like!
If you have any other questions about this project, please reach out here! Jake and I are also working on other DIY tutorials so please send me a message if there is a project you have questions about. ☺️
If you want to know where to find the materials needed for the project, please click on the images below. You will also find direct links for our wallpaper, faucet, and mirror if you are in the market for any of those! The painting is from Revival Consignment in the West End. If you are in the Richmond area, I highly recommend giving them a visit for any of your home decor needs.
Materials


")

")


