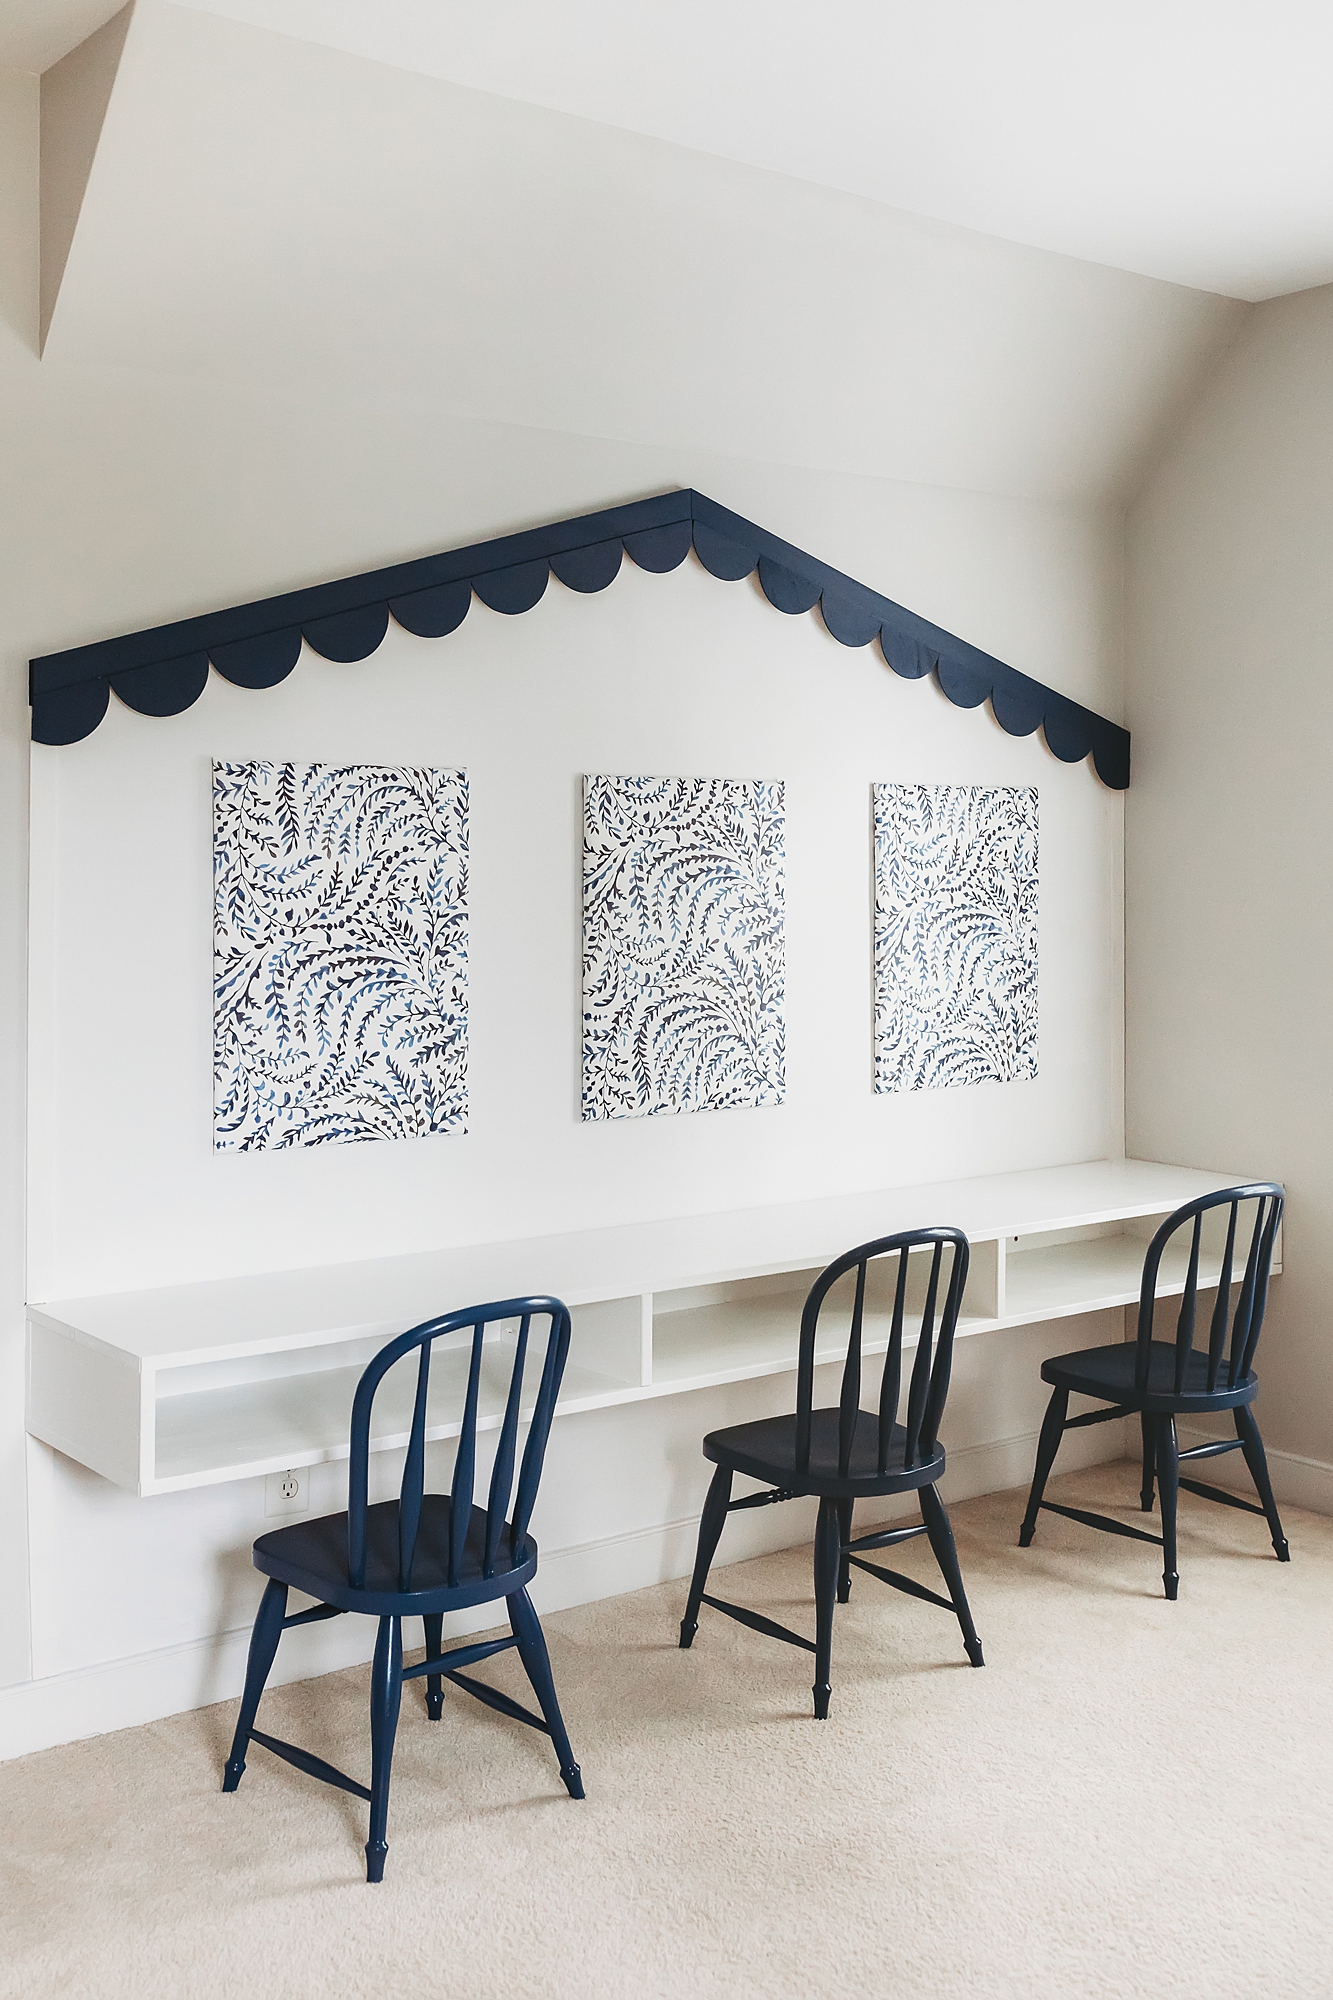
This is one project we were actually able to involve the kids in and they are excited to show off the final space! With the crazy school environment we are facing, we decided we needed an updated school/art space in our house. When the kids first came home from school in March, our dining room become the school and craft area. After 5 long months, I was ready to move all of that stuff upstairs. The bizarre little nook in the kids’ playroom seemed like an ideal space for a desk.
I first saw the idea of a floating desk on Ellison Made’s Instagram. She also has three kids and made the perfect homeschooling space in their bonus room. I liked the sleekness of the floating desk and thought it would work well in the narrow section of our playroom.
Obviously, I love all things blue so a blue roof and scalloped trim seemed like fun details to add to our room. We also already had the 4 Pottery Barn Kids play chairs that were given to us over 5 year ago. I had held on to them, knowing that they were really expensive chairs (they still had tags on the bottom for $129 a piece!) The existing paint was chipping and was a shade of light green that I couldn’t really see fitting in to our room. So I grabbed a can of Benjamin Moore’s Newburyport Blue to use on both the trim roof of the “school house” and the chairs.


How we built the desk
Our first step was to decide how wide we needed the desk to be to give each kid enough space on the desk and in their cubby. We settled on 96 inches, giving each kid about a 32 inch space for their desktop. The wood we used was a piece of MDF. Be sure to look through the stack to find one with edges in tact and no cracks – you usually have to dig through to find a good one. We cut the single piece into 3 and used two 16″ pieces for the top and bottom of the desk. The ends had to be trimmed just a touch to have a 96″ length.


For the vertical pieces that create the cubby, we used prime pine wood instead of common pine. The common pine would have too many knots for the white paint we wanted to use. These pieces were cut to 15 1/4″ so that when connected to the back piece (3/4″) it was equal to the 16″ of the top and bottom.
We used a kreg jig for this project which I highly recommend. We have found so many cool projects to use this on, especially in our old house where we built a lot of furniture. Save yourself some money on the special kreg jig screws and just buy standard one inch all purpose screws with a star head. (I’m told you buy these in the decking screw aisle of your hardware store.)
The boards at the top of the school house are also 1×3 prime pine. To make the scallops, I purchased a bag of wooden 6″ circles and cut them in half. We measured and cut our first one and then used that one as our guide. We traced a line down each circle for cutting which made it much easier. After painting, we used a finishing nailer to attach them to the pine.


The bulletin boards we used were 24″ x 36″ boards that I got on clearance at Hobby Lobby. I just sliced them in half and wrapped them in leftover wallpaper from our powder bath. The print is Priano from Serena & Lily.


Step by step directions
I was working on writing all of the steps out with my dear husband when we started driving each other insane over the details. Soooo I’m going to just send you on over to Ellison Made’s blog where she walks you through exactly how to put it all together. She’s already done all the work writing this out and ours is nearly identical so I’m going to call this an efficient choice and refer you there for the details.
